Cloud Functions: Qwik Start - Command Line
GSP080

Overview
Cloud Functions is a serverless execution environment for building and connecting cloud services. With Cloud Functions you write simple, single-purpose functions that are attached to events emitted from your cloud infrastructure and services. Your Cloud Function is triggered when an event being watched is fired. Your code executes in a fully managed environment. There is no need to provision any infrastructure or worry about managing any servers.
Cloud Functions can be written in Node.js, Python, and Go, and are executed in language-specific runtimes as well. You can take your Cloud Function and run it in any standard Node.js runtime which makes both portability and local testing a breeze.
Connect and Extend Cloud Services
Cloud Functions provides a connective layer of logic that lets you write code to connect and extend cloud services. Listen and respond to a file upload to Cloud Storage, a log change, or an incoming message on a Cloud Pub/Sub topic. Cloud Functions augments existing cloud services and allows you to address an increasing number of use cases with arbitrary programming logic. Cloud Functions have access to the Google Service Account credential and are thus seamlessly authenticated with the majority of Google Cloud services such as Datastore, Cloud Spanner, Cloud Translation API, Cloud Vision API, as well as many others. In addition, Cloud Functions are supported by numerous Node.js client libraries, which further simplify these integrations.
Events and Triggers
Cloud events are things that happen in your cloud environment.These might be things like changes to data in a database, files added to a storage system, or a new virtual machine instance being created.
Events occur whether or not you choose to respond to them. You create a response to an event with a trigger. A trigger is a declaration that you are interested in a certain event or set of events. Binding a function to a trigger allows you to capture and act on events. For more information on creating triggers and associating them with your functions, see Events and Triggers.
Serverless
Cloud Functions removes the work of managing servers, configuring software, updating frameworks, and patching operating systems. The software and infrastructure are fully managed by Google so that you just add code. Furthermore, provisioning of resources happens automatically in response to events. This means that a function can scale from a few invocations a day to many millions of invocations without any work from you.
Use Cases
Asynchronous workloads, for example lightweight ETL or cloud automations, like triggering application builds, no longer need their own server and a developer to wire it up. You simply deploy a Cloud Function bound to the event you want and you're done.
The fine-grained, on-demand nature of Cloud Functions also makes it a perfect candidate for lightweight APIs and webhooks. Because there is automatic provisioning of HTTP endpoints when you deploy an HTTP Function, there is no complicated configuration required as there is with some other services. See the following table for additional common Cloud Functions use cases:
Use Case | Description |
Data Processing / ETL | Listen and respond to Cloud Storage events such as when a file is created, changed, or removed. Process images, perform video transcoding, validate and transform data, and invoke any service on the Internet from your Cloud Function. |
Webhooks | Via a simple HTTP trigger, respond to events originating from 3rd party systems like GitHub, Slack, Stripe, or from anywhere that can send HTTP requests. |
Lightweight APIs | Compose applications from lightweight, loosely coupled bits of logic that are quick to build and that scale instantly. Your functions can be event-driven or invoked directly over HTTP/S. |
Mobile Backend | Use Google's mobile platform for app developers, Firebase, and write your mobile backend in Cloud Functions. Listen and respond to events from Firebase Analytics, Realtime Database, Authentication, and Storage. |
IoT | Imagine tens or hundreds of thousands of devices streaming data into Cloud Pub/Sub, thereby launching Cloud Functions to process, transform and store data. Cloud Functions lets you do in a way that's completely serverless. |
This hands-on lab shows you how to to create, deploy, and test a cloud function using the Google Cloud Shell command line.
What you'll do
- Create a simple cloud function
- Deploy and test the function
- View logs
Setup
Before you click the Start Lab button
Read these instructions. Labs are timed and you cannot pause them. The timer, which starts when you click Start Lab, shows how long Google Cloud resources will be made available to you.
This hands-on lab lets you do the lab activities yourself in a real cloud environment, not in a simulation or demo environment. It does so by giving you new, temporary credentials that you use to sign in and access Google Cloud for the duration of the lab.
What you need
To complete this lab, you need:
- Access to a standard internet browser (Chrome browser recommended).
- Time to complete the lab.
Note: If you already have your own personal Google Cloud account or project, do not use it for this lab.
Note: If you are using a Chrome OS device, open an Incognito window to run this lab.
How to start your lab and sign in to the Google Cloud Console
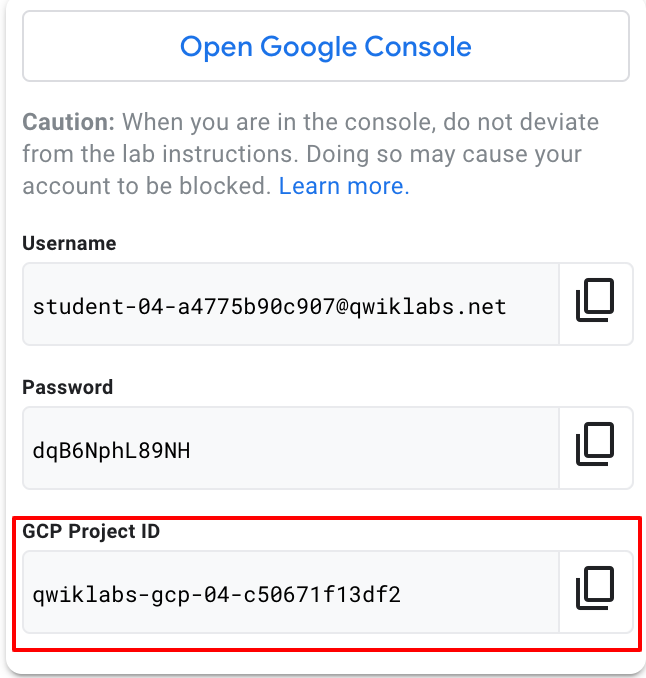
Click the Start Lab button. If you need to pay for the lab, a pop-up opens for you to select your payment method. On the left is a panel populated with the temporary credentials that you must use for this lab.
Copy the username, and then click Open Google Console. The lab spins up resources, and then opens another tab that shows the Sign in page.
Tip: Open the tabs in separate windows, side-by-side.
In the Sign in page, paste the username that you copied from the left panel. Then copy and paste the password.
Important: You must use the credentials from the left panel. Do not use your Google Cloud Training credentials. If you have your own Google Cloud account, do not use it for this lab (avoids incurring charges).
Click through the subsequent pages:
- Accept the terms and conditions.
- Do not add recovery options or two-factor authentication (because this is a temporary account).
- Do not sign up for free trials.


After a few moments, the Cloud Console opens in this tab.
Activate Cloud Shell
Cloud Shell is a virtual machine that is loaded with development tools. It offers a persistent 5GB home directory and runs on the Google Cloud. Cloud Shell provides command-line access to your Google Cloud resources.
In the Cloud Console, in the top right toolbar, click the Activate Cloud Shell button.

Click Continue.

It takes a few moments to provision and connect to the environment. When you are connected, you are already authenticated, and the project is set to your PROJECT_ID. For example:

gcloud is the command-line tool for Google Cloud. It comes pre-installed on Cloud Shell and supports tab-completion.
You can list the active account name with this command:
(Output)
(Example output)
You can list the project ID with this command:
(Output)
(Example output)
Create a function
First, you're going to create a simple function named helloWorld. This function writes a message to the Cloud Functions logs. It is triggered by cloud function events and accepts a callback function used to signal completion of the function.
For this lab the cloud function event is a cloud pub/sub topic event. A pub/sub is a messaging service where the senders of messages are decoupled from the receivers of messages. When a message is sent or posted, a subscription is required for a receiver to be alerted and receive the message. For more information about pub/subs, see Google Cloud Pub/Sub: A Google-Scale Messaging Service.
For more information on the event parameter and the callback parameter, see Background Functions.
To create a cloud function:
In the Cloud Shell command line, create a directory for the function code.
Move to the
gcf_hello_worlddirectory.Create and open
index.jsto edit.Copy the following into the
index.jsfileExit nano (Ctrl+x) and save (Y) the file.
Create a cloud storage bucket
Use the following command to create a new cloud storage bucket for your function:
PROJECT_ID is the Project ID in the connection details of this lab
BUCKET_NAME is the name you give to the bucket. It must be a globally unique name. For more information, see Bucket naming guidelines.
Test Completed Task
Click Check my progress to verify your performed task. If you have completed the task successfully you will granted with an assessment score.
Deploy your function
When deploying a new function, you must specify --trigger-topic, --trigger-bucket, or --trigger-http. When deploying an update to an existing function, the function keeps the existing trigger unless otherwise specified.
For this lab, you'll set the --trigger-topic as hello_world.
Deploy the function to a pub/sub topic named hello_world, replacing
[BUCKET_NAME]with the name of your bucket:
If prompted, enter Y to allow unauthenticated invocations of a new function.
Verify the status of the function.
An ACTIVE status indicates that the function has been deployed.
Every message published in the topic triggers function execution, the message contents are passed as input data.
Test Completed Task
Click Check my progress to verify your performed task. If you have completed the task successfully you will receive an assessment score.
Test the function
After you deploy the function and know that it's active, test that the function writes a message to the cloud log after detecting an event.
Enter this command to create a message test of the function.
The cloud tool returns the execution ID for the function, which means a message has been written in the log.
Example output:
View logs to confirm that there are log messages with that execution ID.
View logs
Check the logs to see your messages in the log history.
If the function executed successfully, messages in the log appear as follows:
Your application is deployed, tested, and you can view the logs.
Test your Understanding
Below are multiple-choice questions to reinforce your understanding of this lab's concepts. Answer them to the best of your abilities.
No comments:
Post a Comment