Sunday, November 14, 2021

GCP: Network and Load Balancer Lab


Set Up Network and HTTP Load Balancers

1 hour5 Credits

GSP007

Google Cloud Self-Paced Labs

Overview

In this hands-on lab you'll learn the differences between a network load balancer and an HTTP load balancer and how to set them up for your applications running on Compute Engine virtual machines (VMs).

There are several ways you can load balance on Google Cloud. This lab takes you through the set up of the following load balancers:

You are encouraged to type the commands yourself, which can help you learn the core concepts. Many labs include a code block that contains the required commands. You can easily copy and paste the commands from the code block into the appropriate places during the lab.

What you'll do

  • Set up a network load balancer.

  • Set up an HTTP load balancer.

  • Get hands-on experience learning the differences between network load balancers and HTTP load balancers.

Setup

Before you click the Start Lab button

Read these instructions. Labs are timed and you cannot pause them. The timer, which starts when you click Start Lab, shows how long Google Cloud resources will be made available to you.

This hands-on lab lets you do the lab activities yourself in a real cloud environment, not in a simulation or demo environment. It does so by giving you new, temporary credentials that you use to sign in and access Google Cloud for the duration of the lab.

What you need

To complete this lab, you need:

  • Access to a standard internet browser (Chrome browser recommended).
  • Time to complete the lab.

Note: If you already have your own personal Google Cloud account or project, do not use it for this lab.

Note: If you are using a Chrome OS device, open an Incognito window to run this lab.

How to start your lab and sign in to the Google Cloud Console

  1. Click the Start Lab button. If you need to pay for the lab, a pop-up opens for you to select your payment method. On the left is a panel populated with the temporary credentials that you must use for this lab.

    Open Google Console

  2. Copy the username, and then click Open Google Console. The lab spins up resources, and then opens another tab that shows the Sign in page.

    Sign in

    Tip: Open the tabs in separate windows, side-by-side.

  3. In the Sign in page, paste the username that you copied from the left panel. Then copy and paste the password.

    Important: You must use the credentials from the left panel. Do not use your Google Cloud Training credentials. If you have your own Google Cloud account, do not use it for this lab (avoids incurring charges).

  4. Click through the subsequent pages:

    • Accept the terms and conditions.
    • Do not add recovery options or two-factor authentication (because this is a temporary account).
    • Do not sign up for free trials.

After a few moments, the Cloud Console opens in this tab.

Activate Cloud Shell

Cloud Shell is a virtual machine that is loaded with development tools. It offers a persistent 5GB home directory and runs on the Google Cloud. Cloud Shell provides command-line access to your Google Cloud resources.

In the Cloud Console, in the top right toolbar, click the Activate Cloud Shell button.
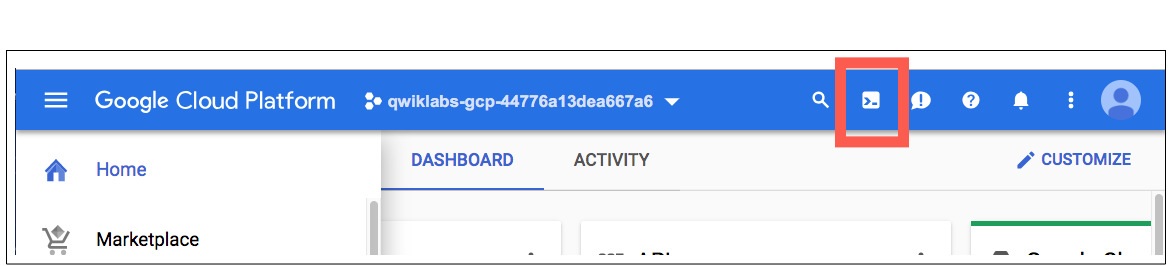
Cloud Shell icon

Click Continue.

cloudshell_continue.png

It takes a few moments to provision and connect to the environment. When you are connected, you are already authenticated, and the project is set to your PROJECT_ID. For example:

Cloud Shell Terminal

gcloud is the command-line tool for Google Cloud. It comes pre-installed on Cloud Shell and supports tab-completion.

You can list the active account name with this command:

gcloud auth list
Copied!

(Output)

Credentialed accounts:
 - <myaccount>@<mydomain>.com (active)

(Example output)

Credentialed accounts:
 - google1623327_student@qwiklabs.net

You can list the project ID with this command:

gcloud config list project
Copied!

(Output)

[core]
project = <project_ID>

(Example output)

[core]
project = qwiklabs-gcp-44776a13dea667a6

Task 1: Set the default region and zone for all resources

  1. In Cloud Shell, set the default zone:

    gcloud config set compute/zone us-central1-a
    Copied!
  2. Set the default region:

    gcloud config set compute/region us-central1
    Copied!

    Learn more about choosing zones and regions here: Regions and Zones documentation

Task 2: Create multiple web server instances

For this load balancing scenario, create three Compute Engine VM instances and install Apache on them, then add a firewall rule that allows HTTP traffic to reach the instances.

  1. Create three new virtual machines in your default zone and give them all the same tag. The code provided sets the zone to us-central1-a. Setting the tags field lets you reference these instances all at once, such as with a firewall rule. These commands also install Apache on each instance and give each instance a unique home page.

gcloud compute instances create www1 \
  --image-family debian-9 \
  --image-project debian-cloud \
  --zone us-central1-a \
  --tags network-lb-tag \
  --metadata startup-script="#! /bin/bash
    sudo apt-get update
    sudo apt-get install apache2 -y
    sudo service apache2 restart
    echo '<!doctype html><html><body><h1>www1</h1></body></html>' | tee /var/www/html/index.html"
Copied!
gcloud compute instances create www2 \
  --image-family debian-9 \
  --image-project debian-cloud \
  --zone us-central1-a \
  --tags network-lb-tag \
  --metadata startup-script="#! /bin/bash
    sudo apt-get update
    sudo apt-get install apache2 -y
    sudo service apache2 restart
    echo '<!doctype html><html><body><h1>www2</h1></body></html>' | tee /var/www/html/index.html"
Copied!
gcloud compute instances create www3 \
  --image-family debian-9 \
  --image-project debian-cloud \
  --zone us-central1-a \
  --tags network-lb-tag \
  --metadata startup-script="#! /bin/bash
    sudo apt-get update
    sudo apt-get install apache2 -y
    sudo service apache2 restart
    echo '<!doctype html><html><body><h1>www3</h1></body></html>' | tee /var/www/html/index.html"
Copied!
  1. Create a firewall rule to allow external traffic to the VM instances:

gcloud compute firewall-rules create www-firewall-network-lb \
    --target-tags network-lb-tag --allow tcp:80
Copied!

Now you need to get the external IP addresses of your instances and verify that they are running.

  1. Run the following to list your instances. You'll see their IP addresses in the EXTERNAL_IP column:

gcloud compute instances list
Copied!
  1. Verify that each instance is running with curl, replacing [IP_ADDRESS] with the IP address for each of your VMs:

curl http://[IP_ADDRESS]
Copied!

Check your lab progress

Click Check my progress below to verify that you've created a group of web servers.

Assessment Completed!

Create multiple web server instances

Assessment Completed!

Task 3: Configure the load balancing service

When you configure the load balancing service, your virtual machine instances will receive packets that are destined for the static external IP address you configure. Instances made with a Compute Engine image are automatically configured to handle this IP address.

  1. Create a static external IP address for your load balancer:

    gcloud compute addresses create network-lb-ip-1 \
     --region us-central1
    Copied!

    (Output)

    Created [https://www.googleapis.com/compute/v1/projects/qwiklabs-gcp-03-xxxxxxxxxxx/regions/us-central1/addresses/network-lb-ip-1].
  2. Add a legacy HTTP health check resource:

    gcloud compute http-health-checks create basic-check
    Copied!
  3. Add a target pool in the same region as your instances. Run the following to create the target pool and use the health check, which is required for the service to function:

gcloud compute target-pools create www-pool \
    --region us-central1 --http-health-check basic-check
Copied!
  1. Add the instances to the pool:

gcloud compute target-pools add-instances www-pool \
    --instances www1,www2,www3
Copied!
  1. Add a forwarding rule:

gcloud compute forwarding-rules create www-rule \
    --region us-central1 \
    --ports 80 \
    --address network-lb-ip-1 \
    --target-pool www-pool
Copied!

Check your lab progress

Click Check my progress below to verify that you've created an L4 network load balancer that points to the web servers.

Assessment Completed!

Configure the load balancing service

Assessment Completed!

Task 4: Sending traffic to your instances

Now that the load balancing service is configured, you can start sending traffic to the forwarding rule and watch the traffic be dispersed to different instances.

Enter the following command to view the external IP address of the www-rule forwarding rule used by the load balancer:

gcloud compute forwarding-rules describe www-rule --region us-central1
Copied!

Use curl command to access the external IP address, replacing IP_ADDRESS with an external IP address from the previous command:

while true; do curl -m1 IP_ADDRESS; done
Copied!

The response from the curl command alternates randomly among the three instances. if your response is initially unsuccessful, wait approximately 30 seconds for the configuration to be fully loaded and for your instances to be marked healthy before trying again.

Use Ctrl + c to stop running the command.

Task 5: Create an HTTP load balancer

HTTP(S) Load Balancing is implemented on Google Front End (GFE). GFEs are distributed globally and operate together using Google's global network and control plane. You can configure URL rules to route some URLs to one set of instances and route other URLs to other instances. Requests are always routed to the instance group that is closest to the user, if that group has enough capacity and is appropriate for the request. If the closest group does not have enough capacity, the request is sent to the closest group that does have capacity.

To set up a load balancer with a Compute Engine backend, your VMs need to be in an instance group. The managed instance group provides VMs running the backend servers of an external HTTP load balancer. For this lab, backends serve their own hostnames.

  1. First, create the load balancer template:

gcloud compute instance-templates create lb-backend-template \
   --region=us-central1 \
   --network=default \
   --subnet=default \
   --tags=allow-health-check \
   --image-family=debian-9 \
   --image-project=debian-cloud \
   --metadata=startup-script='#! /bin/bash
     apt-get update
     apt-get install apache2 -y
     a2ensite default-ssl
     a2enmod ssl
     vm_hostname="$(curl -H "Metadata-Flavor:Google" \
     http://169.254.169.254/computeMetadata/v1/instance/name)"
     echo "Page served from: $vm_hostname" | \
     tee /var/www/html/index.html
     systemctl restart apache2'
Copied!
  1. Create a managed instance group based on the template:

gcloud compute instance-groups managed create lb-backend-group \
   --template=lb-backend-template --size=2 --zone=us-central1-a
Copied!
  1. Create the fw-allow-health-check firewall rule. This is an ingress rule that allows traffic from the Google Cloud health checking systems (130.211.0.0/22 and 35.191.0.0/16). This lab uses the target tag allow-health-check to identify the VMs.

gcloud compute firewall-rules create fw-allow-health-check \
    --network=default \
    --action=allow \
    --direction=ingress \
    --source-ranges=130.211.0.0/22,35.191.0.0/16 \
    --target-tags=allow-health-check \
    --rules=tcp:80
Copied!
  1. Now that the instances are up and running, set up a global static external IP address that your customers use to reach your load balancer.

gcloud compute addresses create lb-ipv4-1 \
    --ip-version=IPV4 \
    --global
Copied!

Note the IPv4 address that was reserved:

gcloud compute addresses describe lb-ipv4-1 \
    --format="get(address)" \
    --global
Copied!
  1. Create a healthcheck for the load balancer:

gcloud compute health-checks create http http-basic-check \
    --port 80
Copied!
  1. Create a backend service:

gcloud compute backend-services create web-backend-service \
    --protocol=HTTP \
    --port-name=http \
    --health-checks=http-basic-check \
    --global
Copied!
  1. Add your instance group as the backend to the backend service:

gcloud compute backend-services add-backend web-backend-service \
    --instance-group=lb-backend-group \
    --instance-group-zone=us-central1-a \
    --global
Copied!
  1. Create a URL map to route the incoming requests to the default backend service:

gcloud compute url-maps create web-map-http \
    --default-service web-backend-service
Copied!
  1. Create a target HTTP proxy to route requests to your URL map:

gcloud compute target-http-proxies create http-lb-proxy \
    --url-map web-map-http
Copied!
  1. Create a global forwarding rule to route incoming requests to the proxy:

gcloud compute forwarding-rules create http-content-rule \
    --address=lb-ipv4-1\
    --global \
    --target-http-proxy=http-lb-proxy \
    --ports=80
Copied!

Check your lab progress

Click Check my progress below to verify that you've created an L7 HTTP(S) load balancer.

Assessment Completed!

Create an HTTP load balancer

Assessment Completed!

Task 6: Testing traffic sent to your instances

  1. In the Cloud Console, from the Navigation menu, go to Network services > Load balancing.

  2. Click on the load balancer that you just created (web-map-http).

  3. In the Backend section, click on the name of the backend and confirm that the VMs are Healthy. If they are not healthy, wait a few moments and try reloading the page.

  4. When the VMs are healthy, test the load balancer using a web browser, going to http://IP_ADDRESS/, replacing IP_ADDRESS with the load balancer's IP address.

This may take three to five minutes. If you do not connect, wait a minute, and then reload the browser.

Your browser should render a page with content showing the name of the instance that served the page, along with its zone (for example, Page served from: lb-backend-group-xxxx).

Congratulations!

Monday, November 8, 2021

Kubernetes: A quick lab on GCP


Kubernetes on Google Cloud

When you run a GKE cluster, you also gain the benefit of advanced cluster management features that Google Cloud provides. These include:

Now that you have a basic understanding of Kubernetes, you will learn how to deploy a containerized application with GKE in less than 30 minutes. Follow the steps below to set up your lab environment.


Task 1: Set a default compute zone

Your compute zone is an approximate regional location in which your clusters and their resources live. For example, us-central1-a is a zone in the us-central1 region.

  1. To set your default compute zone to us-central1-a, start a new session in Cloud Shell, and run the following command:

Your active configuration is: [cloudshell-18528]
student_03_ade82501e04b@cloudshell:~ (qwiklabs-gcp-00-45d397b5dba5)$ gcloud config set compute/zone us-central1-a
Updated property [compute/zone].
ERROR: (gcloud.config.set) Your current active account [ACCOUNT] does not have any valid credentials
Please run:

  $ gcloud auth login

to obtain new credentials.

For service account, please activate it first:

  $ gcloud auth activate-service-account ACCOUNT
student_03_ade82501e04b@cloudshell:~ (qwiklabs-gcp-00-45d397b5dba5)$ gcloud auth login
Go to the following link in your browser:

    https://accounts.google.com/o/oauth2/auth?response_type=code&client_id=32555940559.apps.googleusercontent.com&redirect_uri=urn%3Aietf%3Awg%3Aoauth%3A2.0%3Aoob&scope=openid+https%3A%2F%2Fwww.googleapis.com%2Fauth%2Fuserinfo.email+https%3A%2F%2Fwww.googleapis.com%2Fauth%2Fcloud-platform+https%3A%2F%2Fwww.googleapis.com%2Fauth%2Fappengine.admin+https%3A%2F%2Fwww.googleapis.com%2Fauth%2Fcompute+https%3A%2F%2Fwww.googleapis.com%2Fauth%2Faccounts.reauth&state=jveWm5bPDWHzeINlNlL8Sm2WcsjTYO&prompt=consent&access_type=offline&code_challenge=H11DTINc8p7WqsIAYVx4gMA8A5SQ_DCyYT4jNl6R67s&code_challenge_method=S256

Enter verification code: 4/1AX4XfWiUhQYMZB7lksN7EyzSYy1l6mhB94PtmjO3XSUBJNdNfRjD5a1JZtE

You are now logged in as [student-03-ade82501e04b@qwiklabs.net].
Your current project is [qwiklabs-gcp-00-45d397b5dba5].  You can change this setting by running:
  $ gcloud config set project PROJECT_ID
student_03_ade82501e04b@cloudshell:~ (qwiklabs-gcp-00-45d397b5dba5)$ gcloud config set compute/zone us-central1-a
Updated property [compute/zone].
student_03_ade82501e04b@cloudshell:~ (qwiklabs-gcp-00-45d397b5dba5)$


Use "kubectl options" for a list of global command-line options (applies to all commands).
student_03_ade82501e04b@cloudshell:~ (qwiklabs-gcp-00-45d397b5dba5)$ gcloud container clusters create my-kubecluster1


Use "kubectl options" for a list of global command-line options (applies to all commands).
student_03_ade82501e04b@cloudshell:~ (qwiklabs-gcp-00-45d397b5dba5)$ gcloud container clusters create my-kubecluster1
WARNING: Starting in January 2021, clusters will use the Regular release channel by default when `--cluster-version`, `--release-channel`, `--no-enable-autoupgrade`, and `--no-enable-autorepair` flags are not specified.
WARNING: Currently VPC-native is the default mode during cluster creation for versions greater than 1.21.0-gke.1500. To create advanced routes based clusters, please pass the `--no-enable-ip-alias` flag
WARNING: Starting with version 1.18, clusters will have shielded GKE nodes by default.
WARNING: Your Pod address range (`--cluster-ipv4-cidr`) can accommodate at most 1008 node(s).
WARNING: Starting with version 1.19, newly created clusters and node-pools will have COS_CONTAINERD as the default node image when no image type is specified.
Creating cluster my-kubecluster1 in us-central1-a...done.     
Created [https://container.googleapis.com/v1/projects/qwiklabs-gcp-00-45d397b5dba5/zones/us-central1-a/clusters/my-kubecluster1].
To inspect the contents of your cluster, go to: https://console.cloud.google.com/kubernetes/workload_/gcloud/us-central1-a/my-kubecluster1?project=qwiklabs-gcp-00-45d397b5dba5
kubeconfig entry generated for my-kubecluster1.
NAME: my-kubecluster1
LOCATION: us-central1-a
MASTER_VERSION: 1.20.10-gke.1600
MASTER_IP: 34.133.230.180
MACHINE_TYPE: e2-medium
NODE_VERSION: 1.20.10-gke.1600
NUM_NODES: 3
STATUS: RUNNING
student_03_ade82501e04b@cloudshell:~ (qwiklabs-gcp-00-45d397b5dba5)$


Task 2: Create a GKE cluster

cluster consists of at least one cluster master machine and multiple worker machines called nodes. Nodes are Compute Engine virtual machine (VM) instances that run the Kubernetes processes necessary to make them part of the cluster.

  1. To create a cluster, run the following command, replacing [CLUSTER-NAME] with the name you choose for the cluster (for example:my-cluster).

    gcloud container clusters create [CLUSTER-NAME]
    Copied!

    You can ignore any warnings in the output. It might take several minutes to finish creating the cluster.

    Expected output (Do not copy):

    NAME        LOCATION       ...   NODE_VERSION  NUM_NODES  STATUS
    my-cluster  us-central1-a  ...   1.16.13-gke.401  3          RUNNING


Task 3: Get authentication credentials for the cluster

After creating your cluster, you need authentication credentials to interact with it.

  1. To authenticate the cluster, run the following command, replacing [CLUSTER-NAME] with the name of your cluster:

    gcloud container clusters get-credentials [CLUSTER-NAME]
    Copied!

    Expected output (Do not copy):

    Fetching cluster endpoint and auth data.
    kubeconfig entry generated for my-cluster.

Task 4: Deploy an application to the cluster

You can now deploy a containerized application to the cluster. For this lab, you'll run hello-app in your cluster.

GKE uses Kubernetes objects to create and manage your cluster's resources. Kubernetes provides the Deployment object for deploying stateless applications like web servers. Service objects define rules and load balancing for accessing your application from the internet.

  1. To create a new Deployment hello-server from the hello-app container image, run the following kubectl create command:

    kubectl create deployment hello-server --image=gcr.io/google-samples/hello-app:1.0
    Copied!

    Expected output (Do not copy):

    deployment.apps/hello-server created

    This Kubernetes command creates a Deployment object that represents hello-server. In this case, --image specifies a container image to deploy. The command pulls the example image from a Container Registry bucket. gcr.io/google-samples/hello-app:1.0 indicates the specific image version to pull. If a version is not specified, the latest version is used.

  2. To create a Kubernetes Service, which is a Kubernetes resource that lets you expose your application to external traffic, run the following kubectl expose command:

    kubectl expose deployment hello-server --type=LoadBalancer --port 8080
    Copied!

    In this command:

    • --port specifies the port that the container exposes.
    • type="LoadBalancer" creates a Compute Engine load balancer for your container.

    Expected output (Do not copy):

    service/hello-server exposed
  3. To inspect the hello-server Service, run kubectl get:

    kubectl get service
    Copied!

    Expected output (Do not copy):

    NAME              TYPE              CLUSTER-IP        EXTERNAL-IP      PORT(S)           AGE
    hello-server      loadBalancer      10.39.244.36      35.202.234.26    8080:31991/TCP    65s
    kubernetes        ClusterIP         10.39.240.1       <none>           433/TCP           5m13s
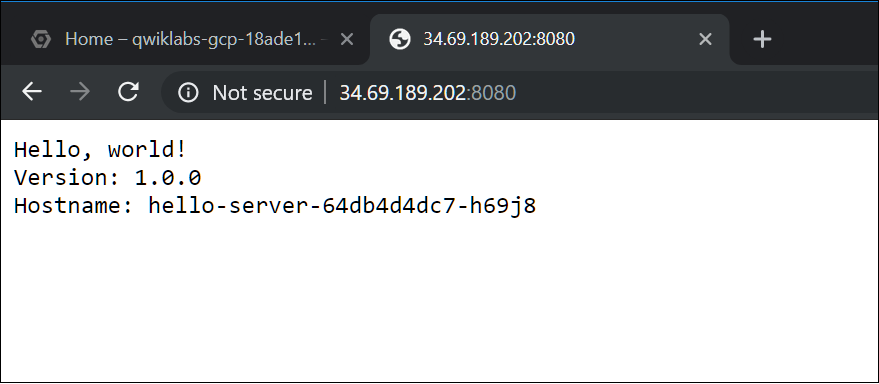
  4. To view the application from your web browser, open a new tab and enter the following address, replacing [EXTERNAL IP] with the EXTERNAL-IP for hello-server.

    http://[EXTERNAL-IP]:8080
    Copied!

    Expected output:

    output.png

  5. Task 5: Deleting the cluster

  1. To delete the cluster, run the following command:

    gcloud container clusters delete [CLUSTER-NAME]
    Cocopy
  2. When prompted, type Y to confirm.


List of commands used:

student_03_ade82501e04b@cloudshell:~ (qwiklabs-gcp-00-45d397b5dba5)$ history
    1  gcloud compute  ssh gcelab1 --zone $ZONE
    2  gcloud auth list
    3  gcloud config set account 'ACCOUNT'
    4  gcloud config set account 'ACCOUNT`
    5  gcloud auth list
    6  gcloud config list project
    7  gcloud config set compute/zone us-central1-a
    8  gcloud auth login
    9  gcloud config set compute/zone us-central1-a
   10  gcloud container clusters create my-kubecluster
   11  gcloud container clusters create my-kubecluster
   12  kubectl
   13  gcloud container clusters create my-kubecluster1
   14  gcloud container clusters get-credentials my-kubecluster1
   15  kubectl create deployment hello-server --image=gcr.io/google-samples/hello-app:1.0
   16  kubectl expose deployment hello-server --type=LoadBalancer --port 8080
   17  kubectl get service
   18  kubectl get service
   19  gcloud container clusters delete my-kubecluster1

Sunday, November 7, 2021

GCP Labs and Learning: Day1

 Google Cloud Basics:


What is Cloud Computing:

On-demand self service

Broad network access

resource pooling

rapid elasticity

measured service


How we got there ?

1. Physical/Colo:  User-configured, managed andmaintained

2.Virtualized: user-configured

3. Serverless:  fully automated

GCP computing architectures:


Computer Engine:  IaaS

Kubernetes Engine: Hybrid

App Engine:  PaaS

Cloud Functions:  Serverless logic

Managed services: automated elastic resources


There are seven categories of Google Cloud services:

  • Compute: A variety of machine types that support any type of workload. The different computing options let you decide how much control you want over operational details and infrastructure.
  • Storage: Data storage and database options for structured or unstructured, relational or nonrelational data.
  • Networking: Services that balance application traffic and provision security rules.
  • Cloud Operations: A suite of cross-cloud logging, monitoring, trace, and other service reliability tools.
  • Tools: Services that help developers manage deployments and application build pipelines.
  • Big Data: Services that allow you to process and analyze large datasets.
  • Artificial Intelligence: A suite of APIs that run specific artificial intelligence and machine learning tasks on Google Cloud.

This link takes you to documentation that covers each of these categories in more detail.


gcloud command line tool guide:    https://cloud.google.com/sdk/gcloud/\\\

Task:  Create a new instance with gcloud


In the Cloud Shell, use gcloud to create a new virtual machine instance from the command line:

gcloud compute instances create gcelab2 --machine-type n1-standard-2 --zone us-central1-f


You can also use SSH to connect to your instance via gcloud. Make sure to add your zone, or omit the --zone flag if you've set the option globally:

gcloud compute ssh gcelab2 --zone us-central1-f

Copied!

root@gcelab:~# gcloud compute instances create gcelab2 --machine-type n1-standard-2 --zone us-central1-fERROR: (gcloud.compute.instances.create) Could not fetch resource: - Request had insufficient authentication scopes.root@gcelab:~# gcloud compute instances create --helproot@gcelab:~# gcloud auth loginYou are running on a Google Compute Engine virtual machine.It is recommended that you use service accounts for authentication.You can run: $ gcloud config set account `ACCOUNT`to switch accounts if necessary.Your credentials may be visible to others with access to thisvirtual machine. Are you sure you want to authenticate withyour personal account?Do you want to continue (Y/n)? YGo to the following link in your browser: https://accounts.google.com/o/oauth2/auth?response_type=code&client_id=32555940559.apps.googleusercontent.com&redirect_uri=urn%3Aietf%3Awg%3Aoauth%3A2.0%3Aoob&scope=openid+https%3A%2F%2Fwww.googleapis.com%2Fauth%2Fuserinfo.email+https%3A%2F%2Fwww.googleapis.com%2Fauth%2Fcloud-platform+https%3A%2F%2Fwww.googleapis.com%2Fauth%2Fappengine.admin+https%3A%2F%2Fwww.googleapis.com%2Fauth%2Fcompute+https%3A%2F%2Fwww.googleapis.com%2Fauth%2Faccounts.reauth&state=WdD33GmHNnCFegP97I1UHlZ3SRyt1G&prompt=consent&access_type=offline&code_challenge=5k51PZEpb3Q1iltqKOd6dvQpm39cJUMCyNxzfNdSR4E&code_challenge_method=S256Enter verification code: 4/1AX4XfWj94bCcfIcdkycwAFIFXAm_oXT3w1xEAw6vBGgesKYPp7RWUt0uD2UYou are now logged in as [student-03-ade82501e04b@qwiklabs.net].Your current project is [qwiklabs-gcp-00-ca462a1639c8]. You can change this setting by running: $ gcloud config set project PROJECT_IDroot@gcelab:~# gcloud compute instances create gcelab2 --machine-type n1-standard-2 --zone us-central1-fCreated [https://www.googleapis.com/compute/v1/projects/qwiklabs-gcp-00-ca462a1639c8/zones/us-central1-f/instances/gcelab2].NAME ZONE MACHINE_TYPE PREEMPTIBLE INTERNAL_IP EXTERNAL_IP STATUSgcelab2 us-central1-f n1-standard-2 10.128.0.3 34.72.124.161 RUNNING

Got into a authentication error on first attempt of creating instance using gcloud. The error is displayed above and solved as well. For more information about solution refere this:

https://stackoverflow.com/questions/49584800/error-gcloud-compute-ssh-could-not-fetch-resource-insufficient-permission